
How to Animate a PowerPoint Presentation: the Complete Guide
How to add animation in PowerPoint: types of effects, step-by-step instructions, trigger settings, the Morph transition and principles of professional animation.

To animate a PowerPoint presentation, select an object on the slide, open the Animations tab and choose an effect from the gallery. The order, speed and start of all effects are set in the Animation Pane — the panel that shows all the motion on the slide at once.
Animation on slides is like spice: a pinch makes the dish tastier, a handful ruins it. It is easy to overdo — the effects gallery just begs you to spin, twirl and scatter letters across the screen. Yet to make an animated presentation look neat, a couple of effects and a few settings that not everyone knows are enough.
What Animation in PowerPoint Is and Why You Need It
Animation in PowerPoint is the movement of objects on a slide. Text slides in from the side, a picture fades in smoothly, an arrow crawls along a diagram. You can animate almost anything: captions, photos, shapes, charts, icons.
The main job of animation is to keep the audience’s attention where the speaker is right now. When a list of seven bullets drops onto the screen at once, people read it to the end in ten seconds and stop listening. If the bullets appear one at a time, the room follows you step by step.
Here is what animation can do for a presentation:
- Set the pace. Information appears when you get to it.
- Remove overload. A complex slide unfolds in parts, and it is easier for the brain to digest.
- Show processes. The stages of a diagram light up in turn, and logistics or a sales funnel become clear without extra words.
- Highlight what matters. A figure that pulses or changes color is remembered better than the rest.
Object Animation vs. Slide Transitions: What’s the Difference
Beginners often confuse two tabs. One is responsible for movement within a slide, the other for changing slides. The table shows how transitions differ from object animation:
| Parameter | Object animation | Transitions |
|---|---|---|
| What moves | A single object on the slide | The whole slide |
| Where it is set up | Animations tab | Transitions tab |
| When it plays | While the slide is shown | When one slide replaces another |
| Example effects | Fly In, Fade, Pulse | Fade, Push, Morph |
Preparing the Slide Before You Animate
Animation will not save a messy slide — it will only shake it up. So tidy up first, and only then start clicking on effects:
- Remove what is unnecessary. The fewer objects on the slide, the clearer the movement of each one.
- Group related elements. An icon and its caption should appear together, so combine them into a group.
- Align objects to the guides. A neat grid makes animation tidy; a crooked one turns it into a jerky dance.
Before moving on to effects, answer three questions: what the viewer should see first, what last, and what appears at the same time. This short script will save you half an hour of wandering around the effects gallery.
Types of Animation in PowerPoint: Four Groups of Effects
All types of animation in PowerPoint fall into four groups, and the program color-codes them. Green stars are entrance effects, yellow ones are emphasis, red ones are exit. The fourth group (motion paths) draws a line along which the object will travel across the slide.
Entrance, Emphasis and Exit Effects
Entrance controls how an object appears on the screen. This is the most useful group: almost any animation starts with it. For business slides, Fade (a soft appearance), Fly In (the object slides in from the edge of the screen) and Zoom (the object grows from a point) work well.
Emphasis works with objects that are already visible. Pulse enlarges an element for a second, Color Pulse highlights it in another color. This makes it easy to accent the key figure without touching the rest.
Exit removes an object from the slide, for example with the same Fade. One warning: if you hide half the slide with exit effects to make room, the problem is the slide itself. It is easier to split it into two.
Motion Paths: Moving an Object Across the Slide
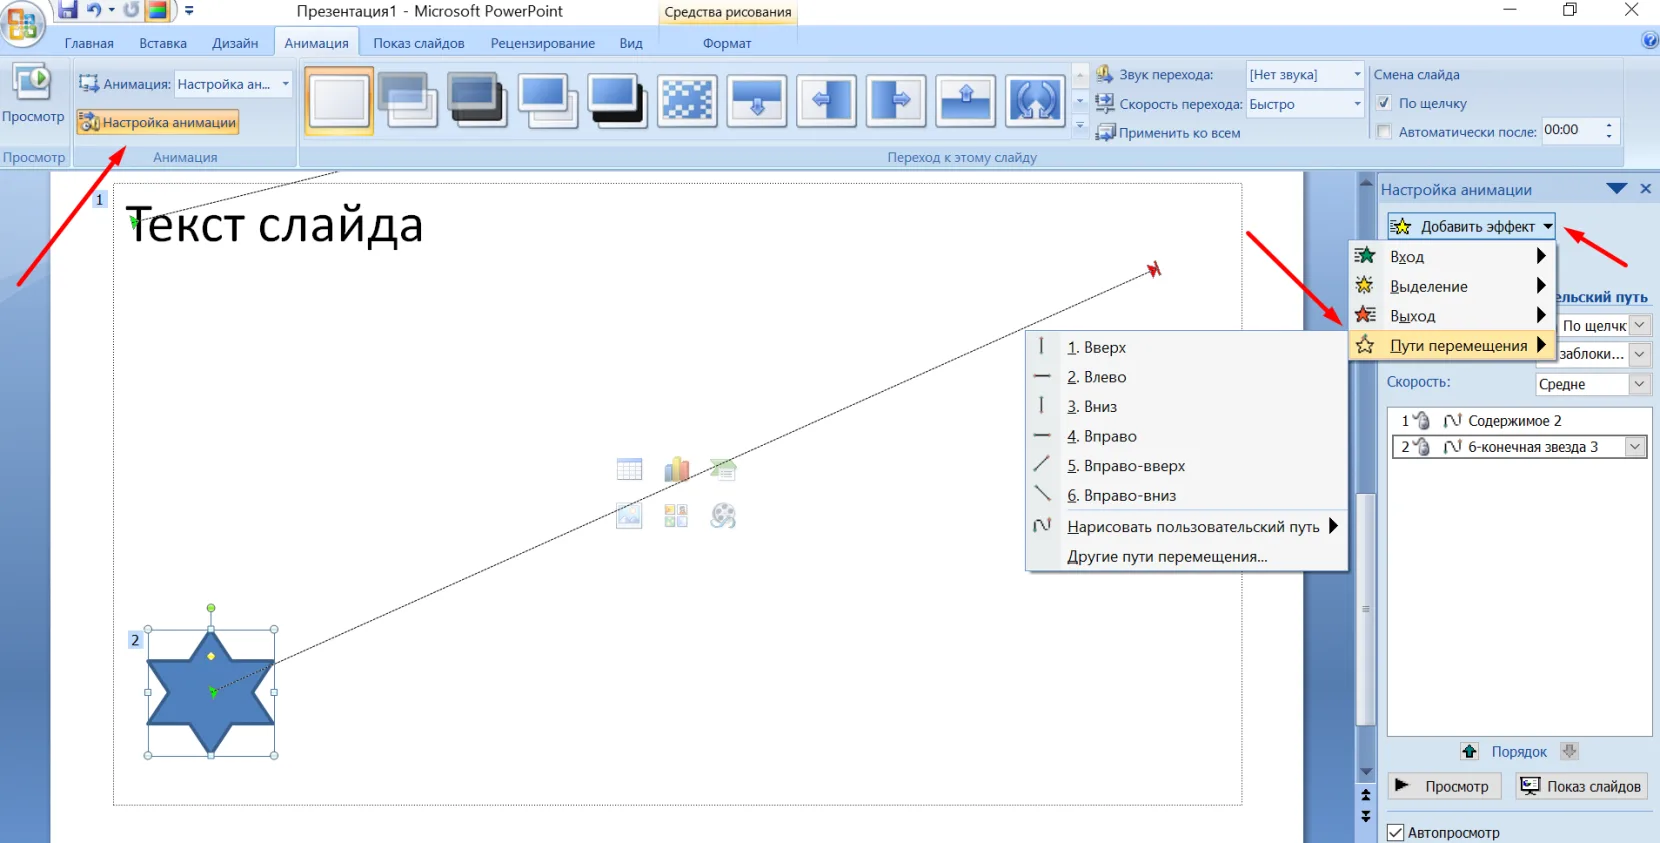
Motion paths are needed when an object has to travel from point A to point B: a car across a map, an arrow along a chart, a ball across a field. You can take a ready-made path (a line, an arc, a loop) or draw your own. Object motion animation is set up like this:
- Select the object.
- On the Animations tab, scroll the gallery to the Motion Paths section.
- Choose a ready-made path or Custom Path and draw the line with the mouse.
- Drag the end point of the path to where the object should stop.
The main trick is in the markers at the ends of the path. The green one shows the start, the red one the finish. The object travels exactly to the red marker, so if it has “flown off” somewhere it should not, check where that marker is first.
How to Add Animation in PowerPoint: Step-by-Step Instructions
The basic routine is the same for any object: select it, open the Animations tab, choose an effect in the gallery and check the number that appears next to the object. That number shows the order in which the effect will play. If several elements should move as one, select them while holding Ctrl, right-click and choose Group, and animate the whole group.
How to Animate Text and Lists by Paragraph
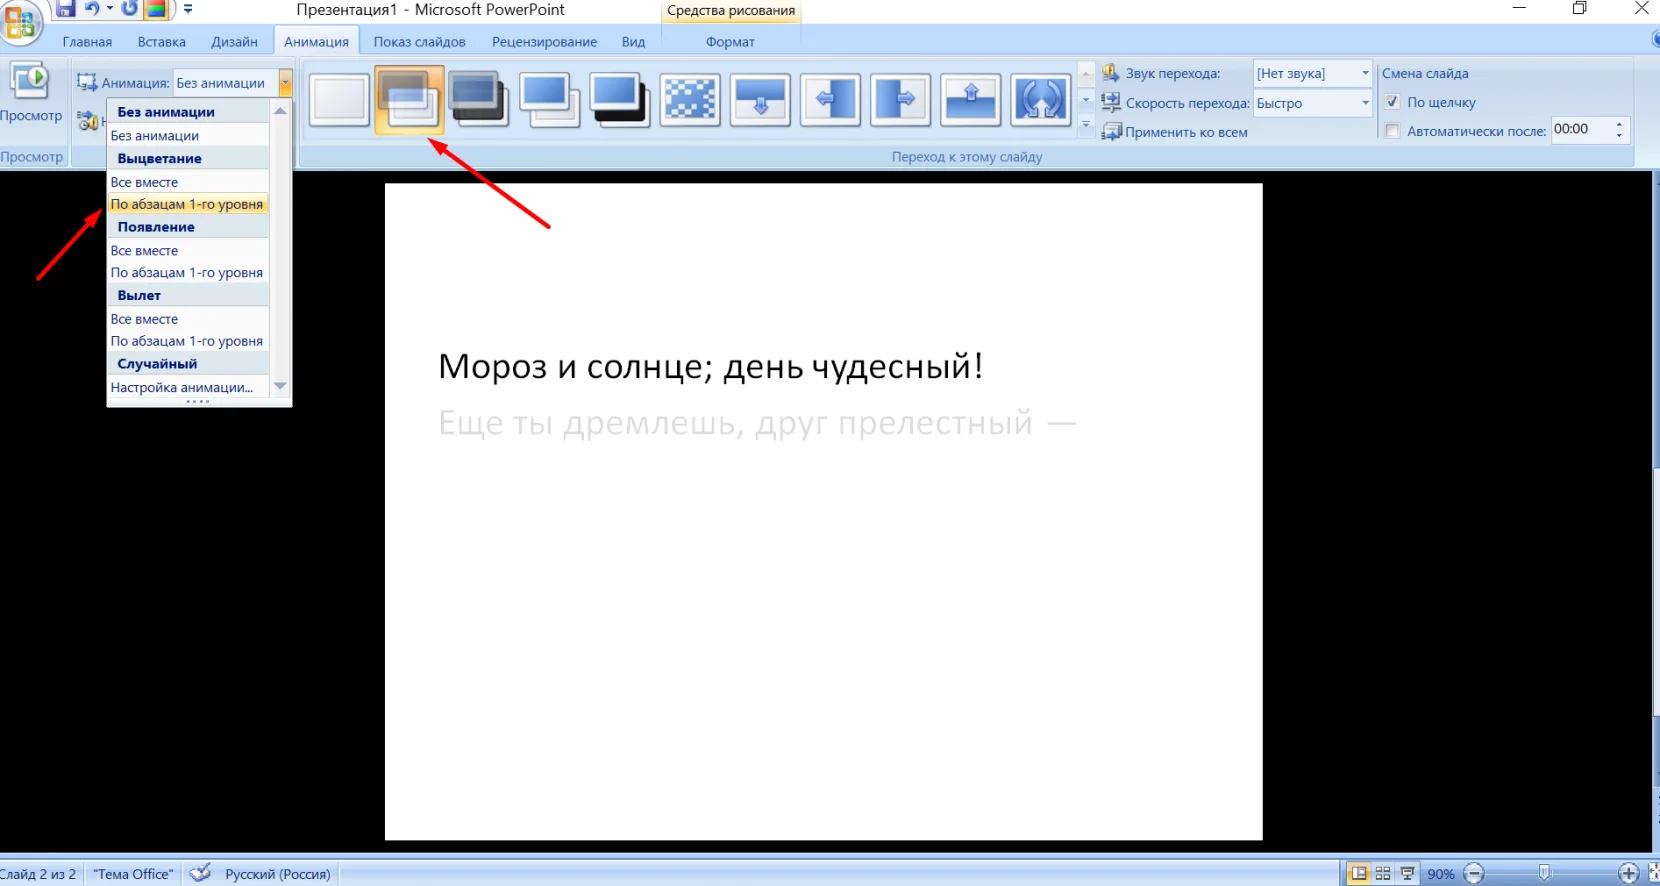
A list that appears one bullet at a time is the best way to keep the room from running ahead. It takes a minute to set up:
- Select the whole text box.
- Add an entrance effect, for example Fade.
- Click Effect Options.
- Choose By Paragraph.
Now each bullet takes the stage on your click. If you want the bullets to appear by themselves, one after another, choose After Previous in the Start field and set a delay of 0.3–0.5 seconds.
How to Animate a Picture and Build an Infographic Piece by Piece
For photos and illustrations, Zoom and Fade work well — they are calm and do not distract from the image. If you want a picture to move more strikingly, try the “assembly” technique. Break the infographic into separate elements and bring them in one by one: blocks appear with an entrance effect, and the arrows between them travel into place along motion paths. The diagram assembles itself before the audience’s eyes, like a construction kit.
How to Add Several Effects to One Object
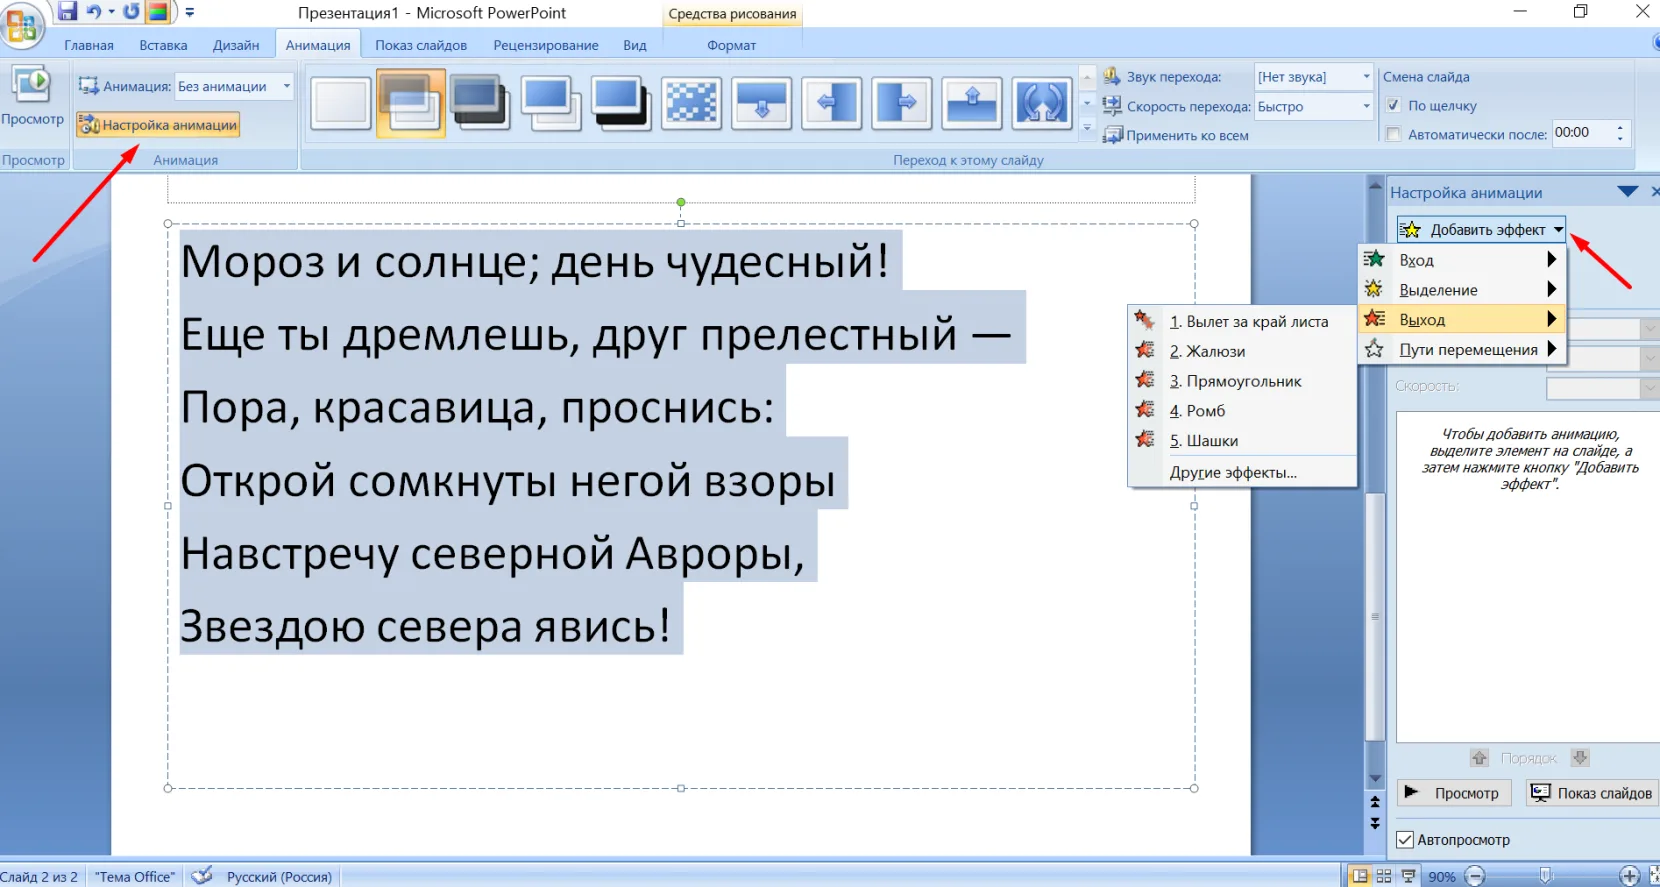
This is where beginners stumble most often. If you pick a second effect in the regular gallery, it replaces the first one. To layer effects, use the Add Animation button: select the object, click it and choose the next effect. Repeat as many times as needed. This way the same chart can fade in smoothly, then highlight a record with a pulse and finally disappear. All of an object’s effects appear as separate rows in the Animation Pane, where you can also put them in order.
Animation Settings: Order, Timing and Start
The Animation Pane is the control panel for all the effects on a slide. It opens with the button of the same name on the Animations tab. Inside is a list of effects with stars of the right color and bars showing the duration of each. With this control panel, setting up animation in PowerPoint takes minutes.
The Order of Effects
The numbers next to objects on the slide are the effects’ sequence numbers. You can change the order in two ways: drag a row up or down in the Animation Pane, or select an effect and click Move Earlier or Move Later on the Animations tab. When the order is ready, click Play All — PowerPoint will show the whole slide without starting the slide show.
Start Options: On Click, With Previous, After Previous
Every effect has three ways to start:
- On Click — the effect waits for your click. Suits situations when you are talking and decide yourself when to show the next thing.
- With Previous — the effect starts at the same time as the previous one. Watch the durations: if two effects have different ones, they will fall out of sync.
- After Previous — the effect starts right after the previous one ends. This is how you build chains that play by themselves.
Experienced authors mix the modes: the first effect on a slide starts on a click, and the rest are chained with After Previous.
Duration and Delay
0.5–1.2 seconds is enough for most effects. Slower, and the viewer starts waiting; faster, and they do not have time to understand what happened. A delay helps set the rhythm in automatic chains. Looping an effect is best left for rare cases: a third pulse in a row tires even the most patient.
| What you animate | Duration | Delay |
|---|---|---|
| Heading, main object | 0.7 s | 0 s |
| List items | 0.5 s | 0.3–0.5 s |
| Supporting elements | 0.5 s | 0.2–0.3 s |
| Motion along a path | 1–1.2 s | 0 s |
Triggers: Starting Animation by Clicking a Specific Object
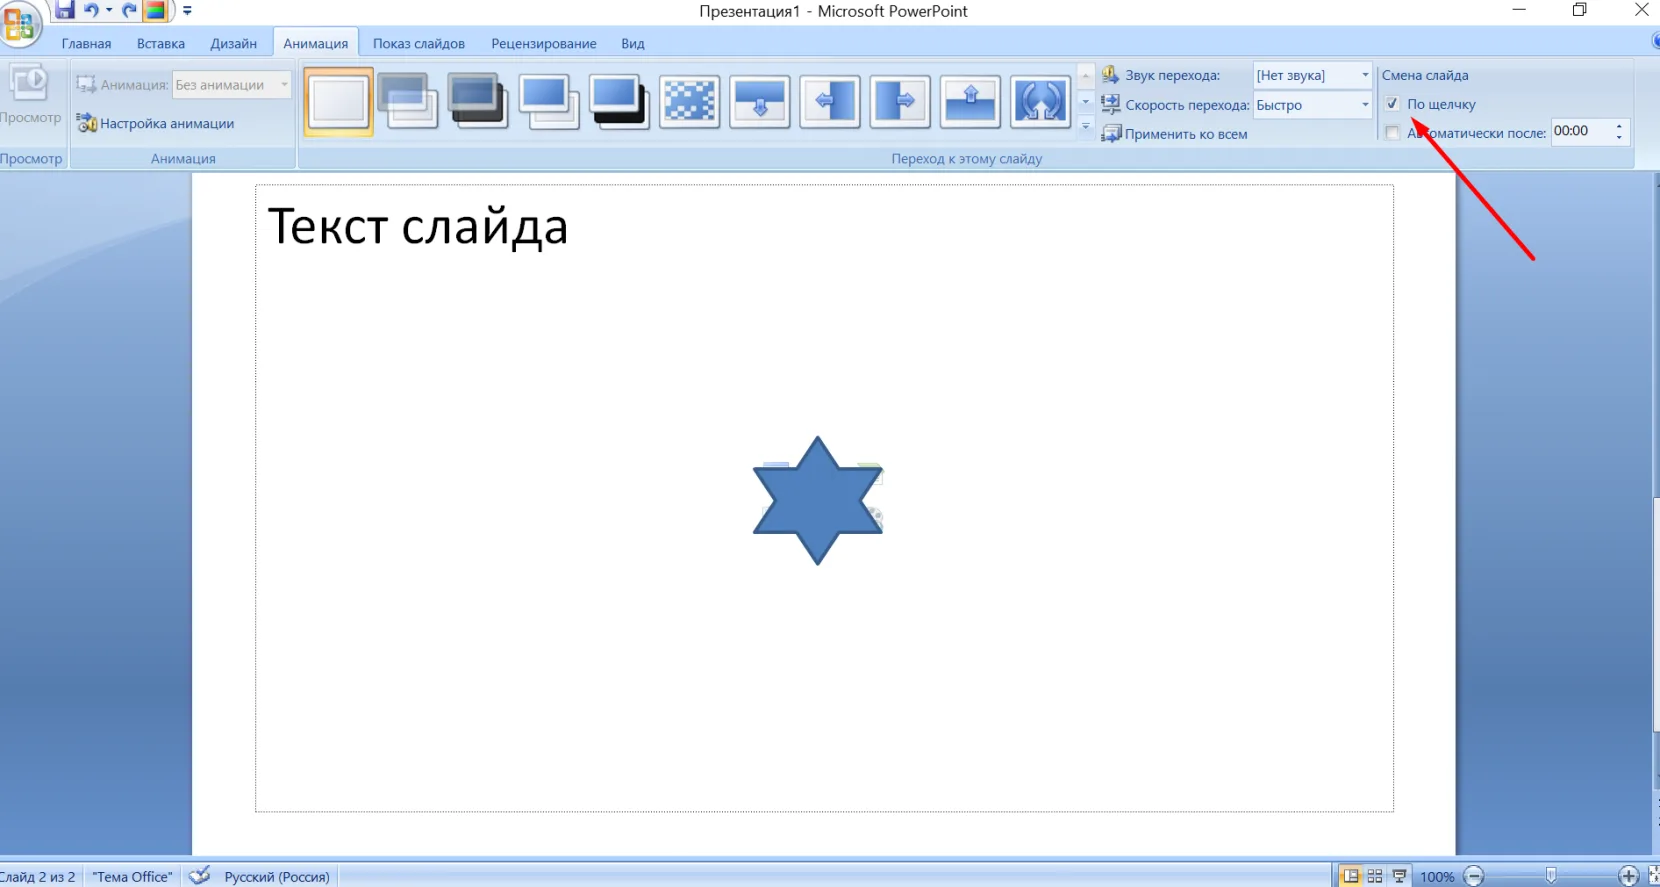
A regular click starts the next effect wherever you click. A trigger ties an effect to a specific object: the animation plays only when you click that object. Triggers in PowerPoint are set up like this:
- Select an object that already has an effect.
- On the Animations tab, click Trigger.
- Choose On Click of.
- Pick from the list the button object that will start the effect.
Triggers make a presentation interactive. They are used to build quizzes where the correct answer lights up on a click, “show more” buttons and slides that unfold in any order following questions from the audience. In slide show mode the cursor over a trigger object turns into a hand — an easy way to check that everything works.
Slide Transitions and the Morph Transition
Transitions control how one slide replaces another. To set up transitions in PowerPoint, open the Transitions tab, choose an effect, and set its options and duration. If you want the same transition for the whole presentation, click Apply To All.
PowerPoint divides transitions into Subtle, Exciting and Dynamic Content. Subtle ones such as Fade and Push are calm and suit business presentations. Exciting ones with cubes, vortexes and flying shards look impressive the first time and tiresome the tenth — they are too noisy for a report to the board of directors. If you do not know what to choose, go with Fade or Morph — with them slides replace each other softly and without extra noise.
The Morph Transition
Morph is the smartest transition in PowerPoint. You show the program what the slide looks like “before” and “after”, and it draws the movement between them itself. Morph in PowerPoint is set up in four steps:
- Create a slide with the objects you need.
- Copy it — right-click the thumbnail and choose Duplicate Slide.
- On the copy, move, enlarge, rotate or recolor the objects.
- Select the second slide and choose Morph on the Transitions tab.
During the show the objects flow smoothly from their old position to the new one. This is how you zoom in on part of a diagram, rearrange blocks or compare “before” and “after”. You can create Morph in PowerPoint for Microsoft 365, 2019, 2021 and 2024 on Windows and Mac, as well as in the apps for iPad, iPhone and Android tablets. PowerPoint 2016 with updates can only play this transition, and without them replaces it with a regular Fade.
PowerPoint Animation Mistakes and How to Make It Look Good
Most PowerPoint animation mistakes repeat from presentation to presentation:
- Too many effects. Every object spins its own way, and the slide turns into a circus. Solution: 2–3 basic effects for the whole presentation.
- Dated transitions. Cubes and blinds look like a greeting from the 2000s. Solution: Fade or Morph.
- Slow effects. A two-second fly-in for every bullet drags the talk out. Solution: 0.5–1.2 seconds.
- Animation instead of meaning. If a slide is unclear without effects, motion will not save it. Solution: work on the content first.
- Ignoring the audience. What looks fun in a school project is irritating at negotiations. Solution: minimal motion for business meetings.
- No backup plan. Someone else’s laptop or an old version of PowerPoint can break the animation. Solution: bring a PDF copy.
Beautiful animated presentations rest on a few rules. Every animation answers the question “why”: to show a stage, highlight a figure, set the pace. The whole presentation relies on the same 2–3 effects, like a single signature style. What matters most moves differently from what is secondary. Effects start and end smoothly, without jerks. And only key slides are animated — videos and complex diagrams draw attention on their own. The best animation is the one the viewer does not notice: they simply follow the speaker’s train of thought.
If you have no time to prepare slides but the talk is important, Veonix will create a turnkey presentation — with structure, design and neat animation that works for your speech.
Key Takeaways
- Animation steers the audience’s attention and sets the pace of the story.
- Tidy up the slide first, then choose effects.
- The Animation Pane is the main control panel for order, timing and start.
- Morph gives the most impressive result with the least effort.
- Start with three key slides and watch the audience’s reaction: that way your animated presentation will grow out of proven techniques.